I almost can’t wait for the weather to turn cooler, so I can wear it.
Blocking is such an important part of knitting, especially knitting lace. And I promise it is nothing to be scared of and you only need a few supplies – blocking mats (optional), blocking wires (optional), pins (lots of them, I like t-pins, but regular sewing pins will work in a pinch), measuring tape, T-square (optional) and lots of patience. Here is how I block:
The first thing I do after binding off is a little celebratory jig (ok, maybe not literary…but at least in my head). The next thing I do is to soak my finished piece for at least a half an hour. I usually put a little Euclean in the bath. The way I figure at some point while I was knitting this my hands were dirty.
I then VERY gently press the water out of the project. Please note that I did not say ring the water out. After all that hard work, you don’t want to take a change of ripping the piece before you can ever use it. Fibers are more fragile when wet. So handle with care.
Next I roll the piece up on in a clean dry towel, pressing even more water out of it.
I then lay out my blocking mats, while gently explaining to the cat that this is not an appropriate place for him to sharpen his claws. Mats are great if you, like me, don’t have a dedicated space for blocking. They can be connected in a variety of shapes and sizes and then can be broken down for easy storage. They are not mandatory though. So if you don’t have any and don’t want to invest, you can use a few layers of towels or even a rug. Something that you can put pins into without damaging the surface below.
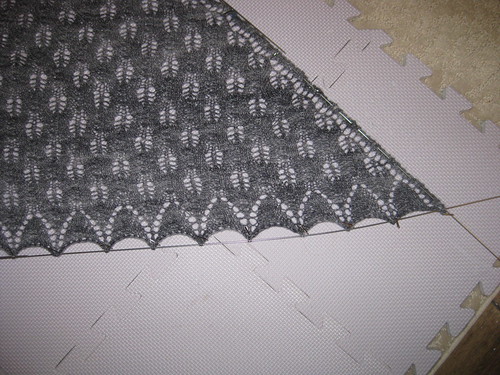
Next I use my trusty blocking wires. If you planning on making (and blocking) a lot of shawls, I highly recommend acquiring a set of wires. When blocking a triangle shawl, I start by putting wire though the “top” of the shawl. This usually takes 2 or 3, depending on the size. I make sure to overlap the wires, which makes it easier to get a straight edge when pinning. I continue by putting a wire down the spine of the shawl.
This is usually when I start pinning. Starting at the center and working out, I pin the top edge first. I always have a measuring tape on hand and make sure that I am pinning the shawl symmetrically. Your center point to edge should be the same on each side. If it is not, just unpin one side and gently stretch it to match the other side.
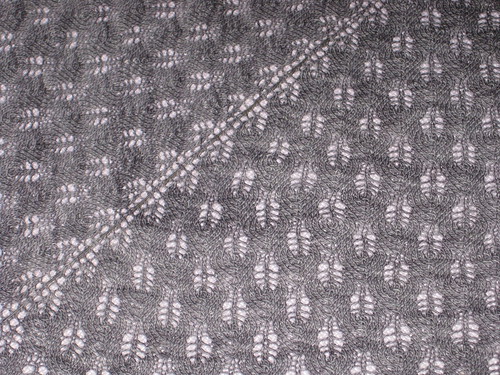
The next step is to pin the center spine. If you have a T-square, it is a good idea to check and make sure the spine of the shawl is at a 90 degree angle from the top edge. But if you don’t have one, you can just eyeball it 9it not like anyone will be walking after you with a T-square shouting that your spine is at 88 degrees).
Don’t be afraid or upset if you have to repeat the pinning a few times. I often go back and tweak things.
Once I am satisfied with me top edge and spine, I move on to the diagonal edges. IF (like the Shetland Triangle) your shawl has points, I run wires though each of the points. Again, depending on the size of your shawl, you may need a few on each side, just make sure to overlap them. Once all my points have been threaded, I gently pull on the wires to stretch the points out. I then pin each point down to the mat. As I pin each point, I measure the space between each point to make sure they are uniform. This is another time when you should plan on doing more than once; I often have to “adjust” my points. If your shawl doesn’t have points, thread your wire though the edge and gentle pull into place.
Repeat this last step for the other diagonal edge.
The next step is the hardest…waiting.
Once the shawl is dry, unpin and wear with pride!
Stay tuned…next post will include pictures of the finished shawl.
No comments:
Post a Comment